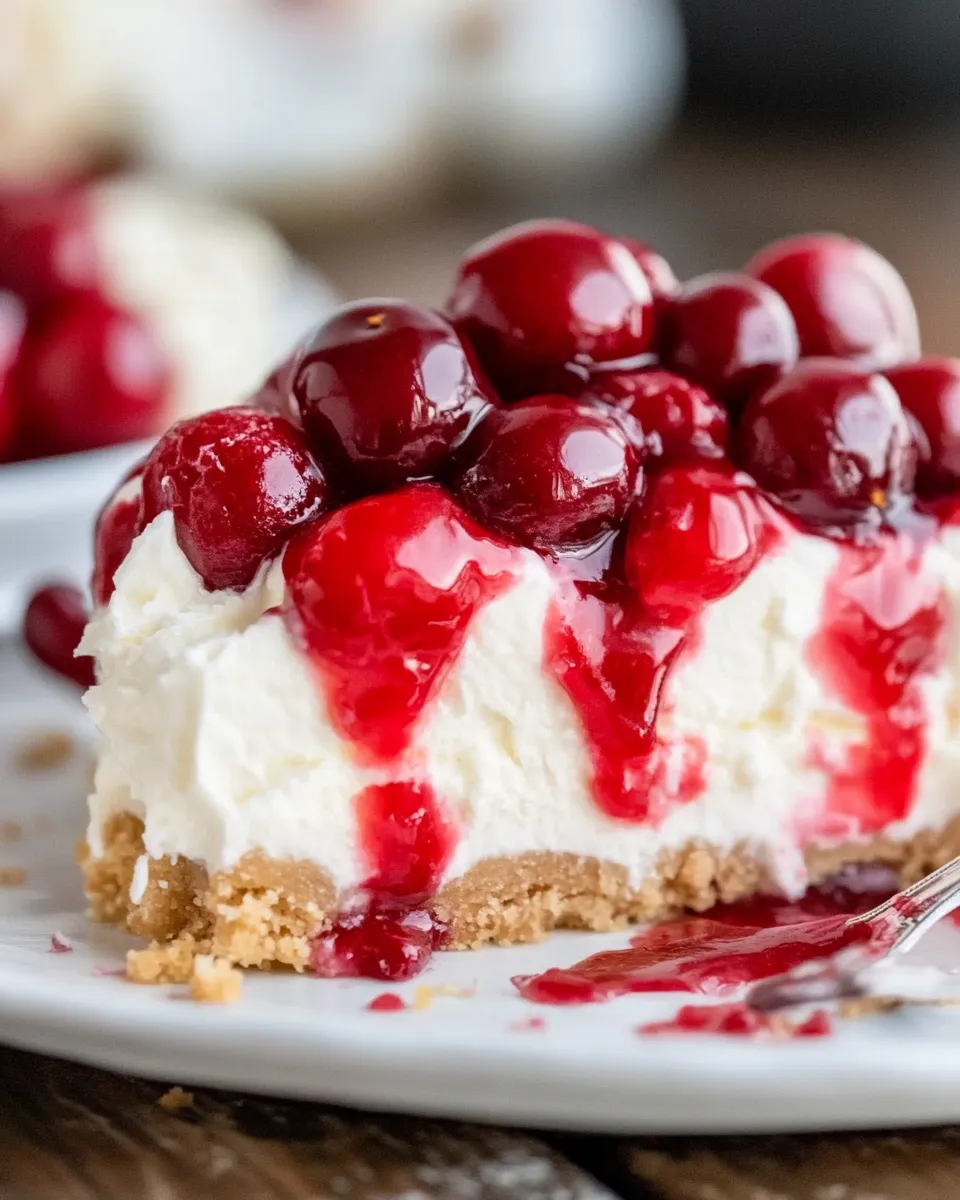
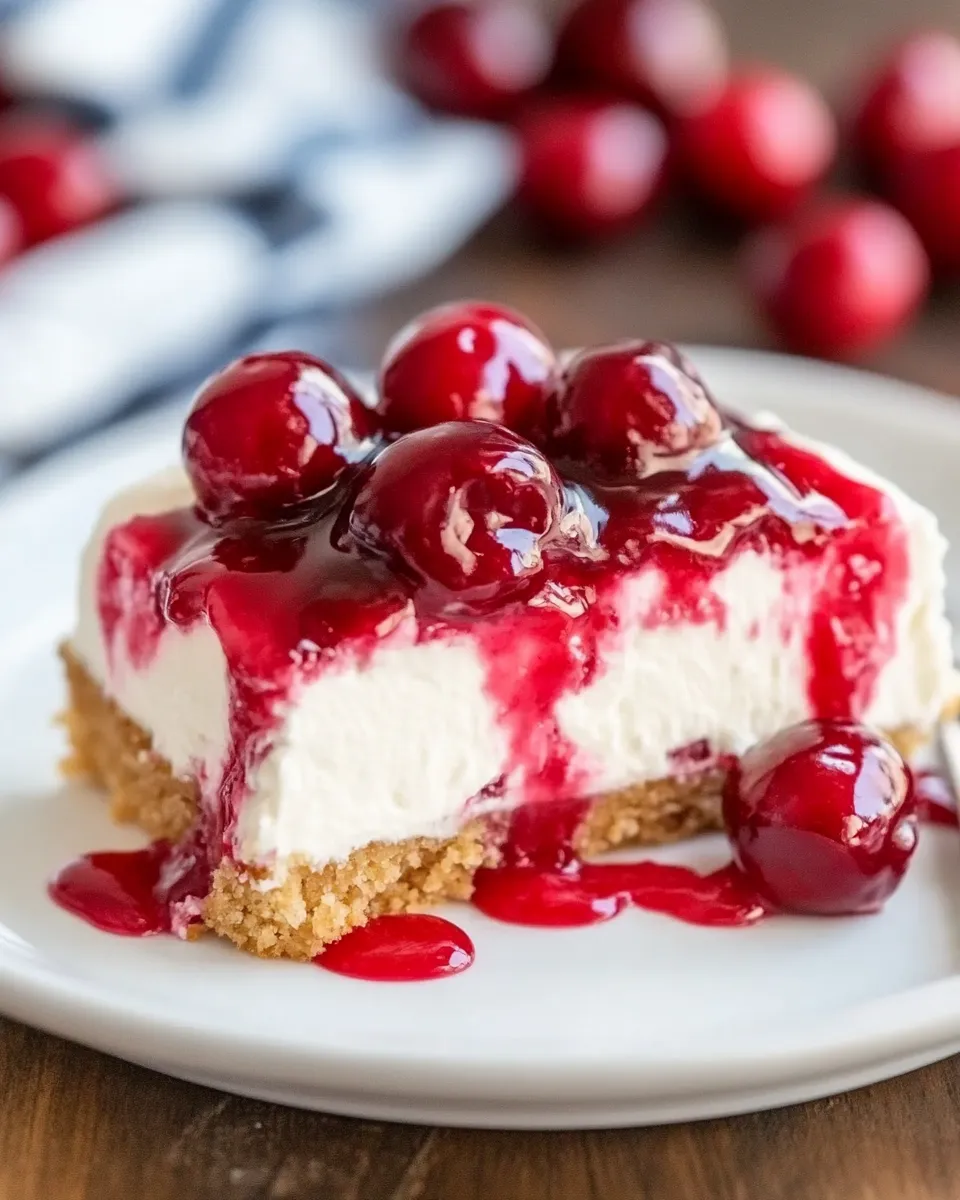
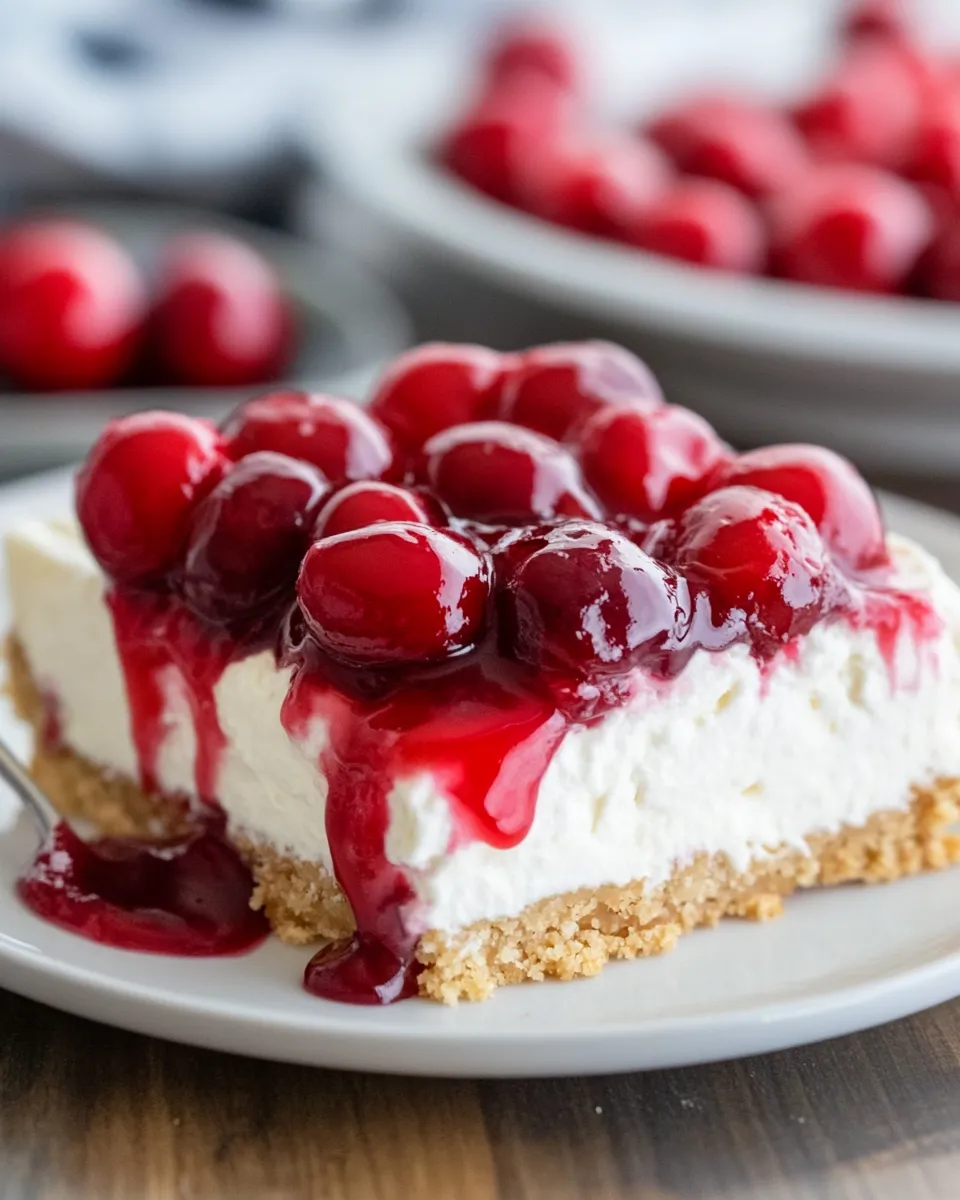
If you’re craving a luscious, creamy dessert that’s effortless to make and sure to impress, this No Bake Cherry Cheesecake is your new best friend. Perfectly creamy with a hint of tang from the cream cheese, a buttery biscuit base, and topped with a vibrant cherry topping, this cheesecake requires no oven time and minimal fuss. Whether you’re a seasoned baker or a kitchen newbie, this recipe guarantees a show-stopping dessert that’s ready in under 4 hours — most of which is chill time. Let’s dive into why this cheesecake belongs in your dessert rotation and how you can whip it up with ease.
Why This Recipe Is a Must-Try
This no bake cherry cheesecake is the ultimate blend of convenience and flavor. Unlike traditional cheesecakes that demand slow baking and precise temperature control, this recipe skips the oven altogether. The result? A smooth, creamy texture that’s just as satisfying, if not more so. Here’s why it’s a winner in my book:
- Quick and Easy: From start to finish, it takes less than 30 minutes of active prep time.
- No Oven Needed: Perfect for hot summer days or when you want to keep your kitchen cool.
- Deliciously Creamy: The combination of cream cheese and whipped cream gives it a velvety texture.
- Beautiful Presentation: The vibrant cherry topping adds a pop of color and a burst of fruity flavor.
- Customizable: Easily swap out the cherries for other fruits or toppings to suit your mood.
This dessert is ideal for celebrations, potlucks, or simply treating yourself to something special without any stress.
Ingredients
- 200g digestive biscuits or graham crackers (ensure they contain no alcohol-based ingredients)
- 100g unsalted butter, melted
- 400g cream cheese, softened (use a trusted brand)
- 1 cup heavy whipping cream (or a -certified cream alternative)
- 3/4 cup granulated sugar
- 1 teaspoon pure vanilla extract
- 1 tablespoon lemon juice (freshly squeezed)
- 1 packet powdered gelatin (or agar-agar powder as a vegetarian alternative)
- 1/4 cup cold water
- 1 cup cherry pie filling or fresh pitted cherries simmered with a bit of sugar
How To Make No Bake Cherry Cheesecake
Step 1: Prepare the Crust
Start by crushing your digestive biscuits or graham crackers into fine crumbs. You can do this by placing them in a sealed plastic bag and rolling over them with a rolling pin or pulsing them in a food processor. Once finely crushed, mix the crumbs with the melted butter until the mixture resembles wet sand.
Press the crumb mixture evenly into the base of a 9-inch springform pan or a pie dish, creating a compact, even layer. Place it in the refrigerator to chill and firm up while you prepare the filling.
Step 2: Bloom the Gelatin
In a small bowl, sprinkle the powdered gelatin over the cold water. Allow it to sit for 5 minutes to bloom (absorb the water and swell). Once bloomed, gently heat the gelatin mixture in the microwave or over a double boiler until fully dissolved, making sure not to boil. Set aside to cool slightly.
Step 3: Make the Cheesecake Filling
In a large mixing bowl, beat the softened cream cheese with the granulated sugar, vanilla extract, and lemon juice until smooth and creamy. Using a hand mixer or stand mixer, whip the heavy cream until stiff peaks form.
Slowly pour the dissolved gelatin into the cream cheese mixture, mixing continuously to combine fully. Then, gently fold the whipped cream into the cream cheese mixture using a spatula, being careful not to deflate the whipped cream. This folding technique helps keep the filling light and airy.
Step 4: Assemble the Cheesecake
Pour the cheesecake filling over the chilled crust, spreading it evenly with a spatula. Smooth the top for a clean finish.
Refrigerate the cheesecake for at least 3 hours, or until fully set — overnight chilling works great if you want to prepare it in advance.
Step 5: Add the Cherry Topping
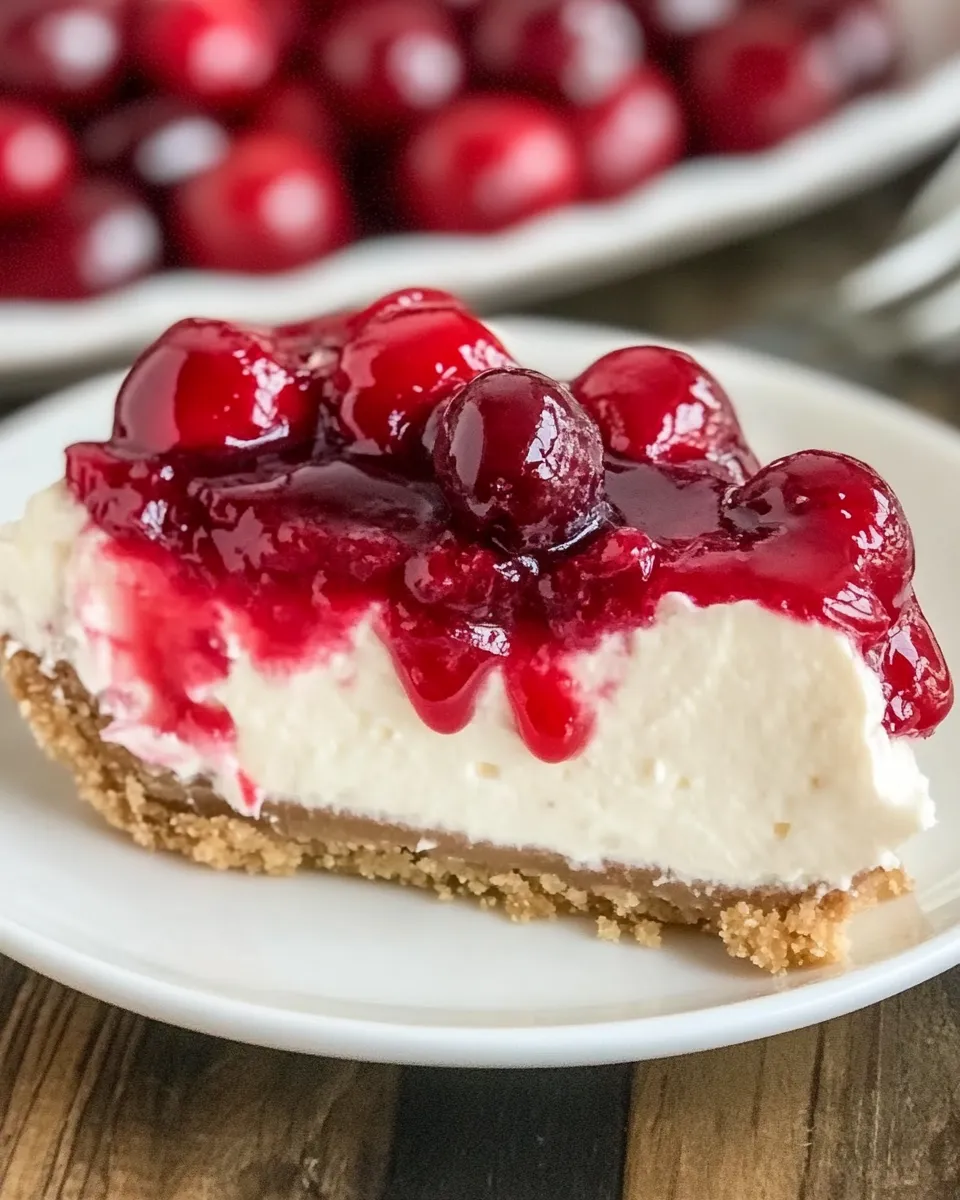
Once the cheesecake is set, gently spoon the cherry pie filling or fresh cherry compote over the top. Spread it evenly or create pretty swirls with the back of a spoon. Return to the fridge for another 15 minutes to let the topping settle.
Your no bake cherry cheesecake is now ready to slice and serve!
Expert Tips

- Room Temperature Ingredients: Ensure the cream cheese is softened to room temperature for a smooth, lump-free filling.
- Whip Cream Properly: Whip the cream just until stiff peaks form. Over-whipping can turn it into butter.
- Gelatin Handling: Avoid boiling the gelatin, as it can lose its setting power. Warm it gently until dissolved.
- Even Crust Layer: Use the bottom of a glass or measuring cup to press the crust down firmly and evenly.
- Chilling Time: Don’t rush the chilling process. The cheesecake needs enough time to set properly for clean slices.
- Cherry Topping: If using fresh cherries, simmer them with a little sugar and lemon juice until they release their juice and soften.
Variations and Customizations
- Berry Mix: Swap out cherries for a mix of blueberries, raspberries, and strawberries for a fresh berry cheesecake.
- Chocolate Twist: Add 1/4 cup cocoa powder to the cream cheese mixture for a chocolate cherry cheesecake.
- Nutty Crust: Add finely chopped nuts like almonds or pecans to the crust for extra crunch and flavor.
- Vegan Alternative: Use coconut cream and a plant-based cream cheese substitute, and agar-agar instead of gelatin.
- Citrus Zest: Add a teaspoon of lemon or orange zest to the filling for a bright citrus note.
- Alcohol-Free Cherry Sauce: Ensure cherry pie filling or compote is alcohol-free to keep the recipe suitable for all.
How to Store Leftovers
Store any leftover cheesecake in an airtight container or cover the springform pan tightly with plastic wrap. Keep it refrigerated for up to 4 days. Avoid freezing this cheesecake, as the texture may become grainy once thawed. When ready to enjoy again, serve chilled straight from the fridge for the best flavor and texture.
FAQ
Can I use fresh cherries instead of cherry pie filling?
Absolutely! Fresh cherries can be simmered with a bit of sugar and lemon juice until they soften and release their juices, creating a natural, homemade cherry topping. This is a delicious and fresh alternative to store-bought pie filling.
Is there a substitute for gelatin if I don’t want to use it?
Yes, you can use agar-agar powder as a vegetarian and -friendly alternative. Use the same amount, but follow the package instructions carefully as agar-agar sets differently than gelatin.
Can I make this cheesecake in advance?
Yes! This no bake cheesecake actually tastes better after sitting overnight in the fridge, allowing the flavors to meld and the texture to firm up perfectly. Just make sure to cover it well to prevent it from absorbing any fridge odors.
What can I do if my cheesecake filling is too runny?
If your filling is too runny, it might be due to insufficient gelatin or under-whipped cream. To fix this, you can add a little more dissolved gelatin or whip some additional cream and fold it in. Also, make sure to chill the cheesecake long enough — it needs time to set properly.
Conclusion
This No Bake Cherry Cheesecake is a divine dessert that’s both simple and stunning. With its creamy filling, buttery crust, and vibrant cherry topping, it’s a crowd-pleaser that doesn’t require turning on your oven. Whether you’re making it for a special occasion or just because you deserve a sweet treat, this recipe is sure to become a favorite in your dessert repertoire. So grab your ingredients, take a little time to whip it up, and enjoy a slice of pure indulgence anytime you want!
No Bake Cherry Cheesecake
Ingredients
- 200 g digestive biscuits or graham crackers ensure they contain no alcohol-based ingredients
- 100 g unsalted butter melted
- 400 g cream cheese softened (use a trusted brand)
- 1 cup heavy whipping cream or a -certified cream alternative
- 3/4 cup granulated sugar
- 1 teaspoon pure vanilla extract
- 1 tablespoon lemon juice freshly squeezed
- 1 packet powdered gelatin or agar-agar powder as a vegetarian alternative
- 1/4 cup cold water
- 1 cup cherry pie filling or fresh pitted cherries simmered with a bit of sugar
Instructions
- Crush digestive biscuits or graham crackers into fine crumbs using a sealed plastic bag and rolling pin or food processor. Mix crumbs with melted butter until mixture resembles wet sand.
- Press the crumb mixture evenly into the base of a 9-inch springform pan or pie dish, creating a compact, even layer. Place in the refrigerator to chill and firm up while preparing the filling.
- Sprinkle powdered gelatin over cold water in a small bowl. Let sit for 5 minutes to bloom. Gently heat the gelatin mixture in microwave or over double boiler until fully dissolved without boiling. Set aside to cool slightly.
- In a large mixing bowl, beat softened cream cheese with granulated sugar, vanilla extract, and lemon juice until smooth and creamy. Whip heavy cream until stiff peaks form using a hand or stand mixer.
- Slowly pour dissolved gelatin into cream cheese mixture, mixing continuously to combine fully. Gently fold whipped cream into the cream cheese mixture using a spatula to keep filling light and airy.
- Pour cheesecake filling over chilled crust, spreading evenly with a spatula. Smooth the top for a clean finish.
- Refrigerate cheesecake for at least 3 hours, or until fully set. Overnight chilling works well if preparing in advance.
- Once set, gently spoon cherry pie filling or fresh cherry compote over the top. Spread evenly or create swirls with the back of a spoon. Return to fridge for another 15 minutes to let topping settle.
- Slice and serve the no bake cherry cheesecake chilled.
Equipment
- 9-inch springform pan
- Plastic bag
- Rolling Pin
- Food Processor
- Mixing Bowl
- Hand Mixer
- Spatula
- Microwave or double boiler
- Refrigerator