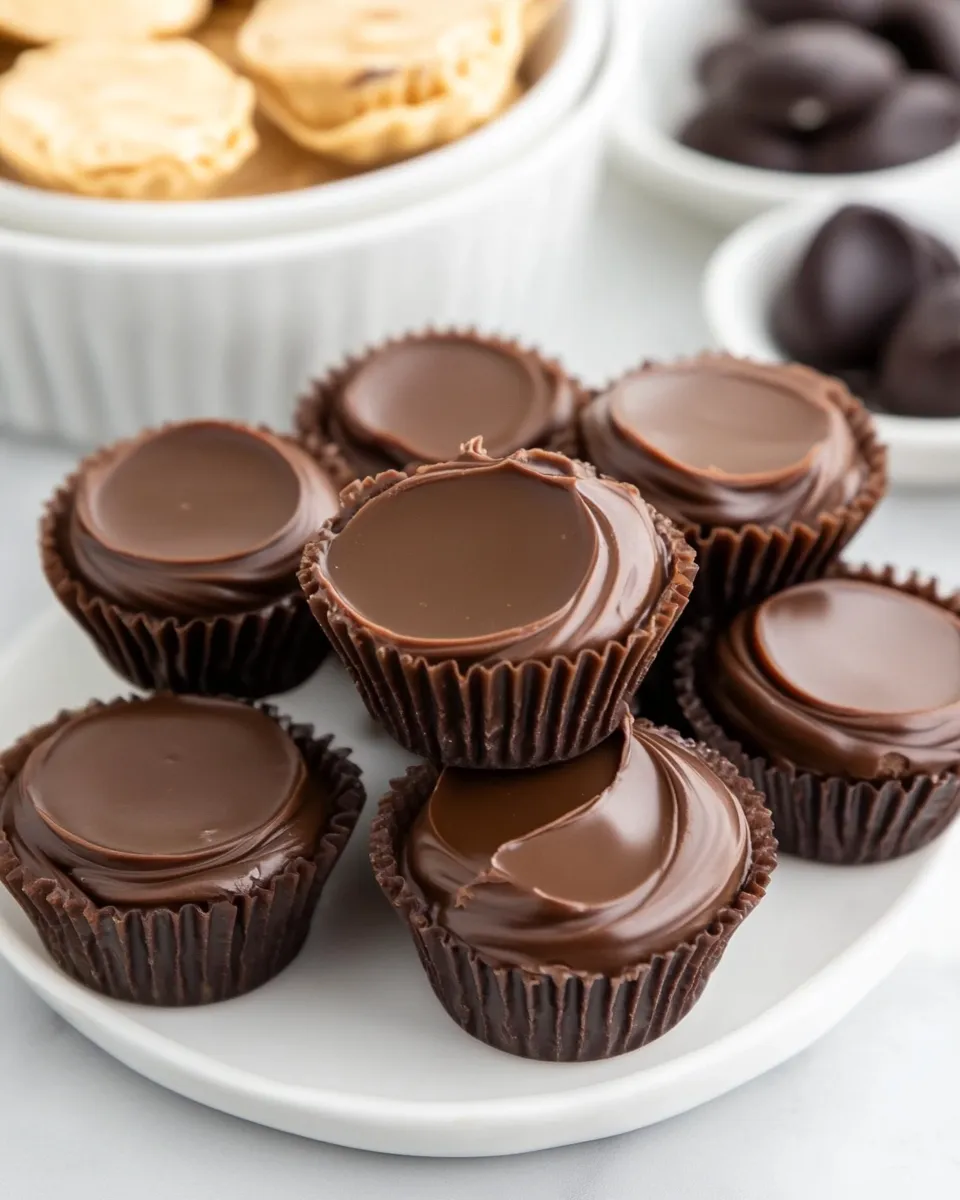
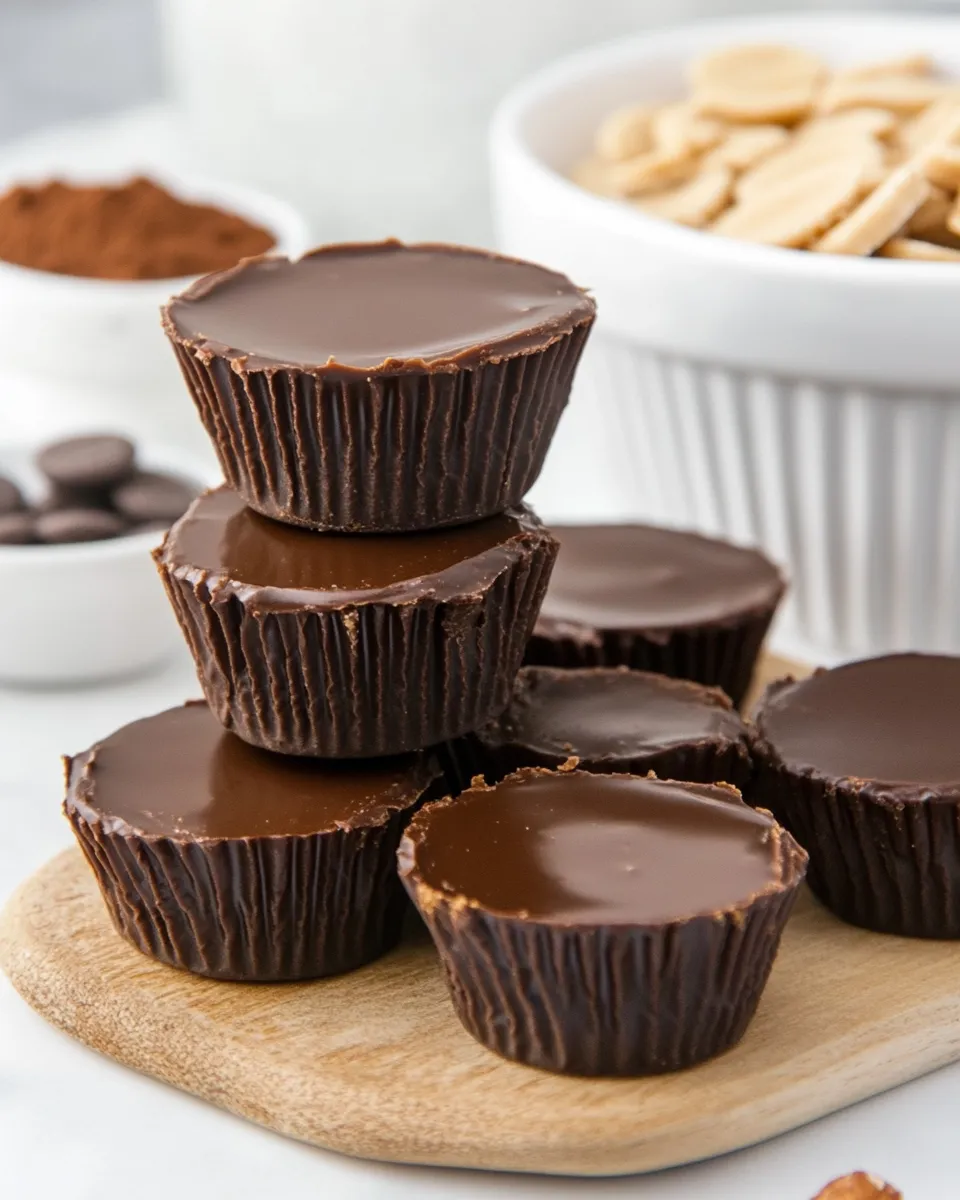
If you’re a fan of the classic peanut butter cup, you’re in for a real treat with this homemade version. There’s something incredibly satisfying about crafting your own peanut butter cups from scratch—the rich, creamy peanut butter center paired with smooth, luscious chocolate creates the perfect bite-sized indulgence. Plus, making them at home means you control the ingredients, so you can avoid any unwanted additives and tailor the sweetness and texture to your liking. Whether you’re looking for a fun project, a gift for a loved one, or just a delicious snack to satisfy your sweet tooth, these homemade peanut butter cups deliver every time.
Why This Recipe Is a Must-Try
There are countless peanut butter cup recipes out there, but this one stands out for several reasons:
- Simple Ingredients: No complicated or hard-to-find ingredients here—just pantry staples that you can easily source and trust.
- Customizable Sweetness: Adjust the amount of sweetener in the peanut butter filling to suit your taste, making it perfect for those who prefer a less sugary treat.
- Rich and Creamy Texture: The peanut butter is combined with just the right amount of powdered sugar and a hint of salt to create a creamy, yet firm center that holds up beautifully.
- Perfectly Smooth Chocolate Coating: Using good quality chocolate and a bit of coconut oil ensures a silky finish that sets up with a satisfying snap.
- Made with Care: Every step is designed to be user-friendly, so even if you’re new to candy making, you’ll have success.
Once you try these peanut butter cups, you might never buy the store-bought ones again!
Ingredients
- 1 cup creamy peanut butter (smooth and unsweetened or lightly salted)
- 1/4 cup powdered sugar (adjust to taste)
- 1/4 teaspoon fine sea salt (optional, but enhances flavor)
- 1 1/2 cups good quality dark or milk chocolate chips (choose dairy-free if preferred)
- 1 tablespoon coconut oil (helps chocolate set with a smooth finish)
- Mini cupcake liners (for shaping the cups)
How To Make Homemade Peanut Butter Cups
Step 1: Prepare Your Workspace
Line a standard muffin tin with mini cupcake liners. This will keep your peanut butter cups perfectly shaped and make them easy to remove once set. Set the tin aside on a baking sheet for easy transportation to the fridge or freezer.
Step 2: Make the Peanut Butter Filling
In a medium bowl, combine the creamy peanut butter, powdered sugar, and sea salt. Mix thoroughly until the mixture is smooth, thick, and holds together well. If it feels too sticky or soft, add a little more powdered sugar, one tablespoon at a time. The filling should be firm enough to shape into small discs.
Step 3: Melt the Chocolate
Using a double boiler or microwave, gently melt the chocolate chips and coconut oil together. If using a microwave, heat in 30-second increments, stirring well after each session to avoid burning. The coconut oil ensures the chocolate has a glossy finish and sets nicely.
Step 4: Create the Chocolate Base
Spoon about 1 teaspoon of the melted chocolate into the bottom of each cupcake liner. Use the back of a spoon to spread it evenly across the base. This layer forms the bottom shell of your peanut butter cup. Place the muffin tin in the fridge or freezer for about 10 minutes to allow the chocolate to harden.
Step 5: Add the Peanut Butter Filling
Once the chocolate base is firm, scoop a small amount (about 1 teaspoon) of the peanut butter filling and roll it into a ball. Flatten it gently into a disc shape that fits neatly inside the chocolate base. Place the peanut butter disc on top of the hardened chocolate layer in each liner.
Step 6: Cover with Chocolate
Spoon more melted chocolate over the peanut butter discs, ensuring the filling is completely covered. Tap the muffin tin gently on the counter to smooth out the chocolate and remove any air bubbles.
Step 7: Chill Until Set
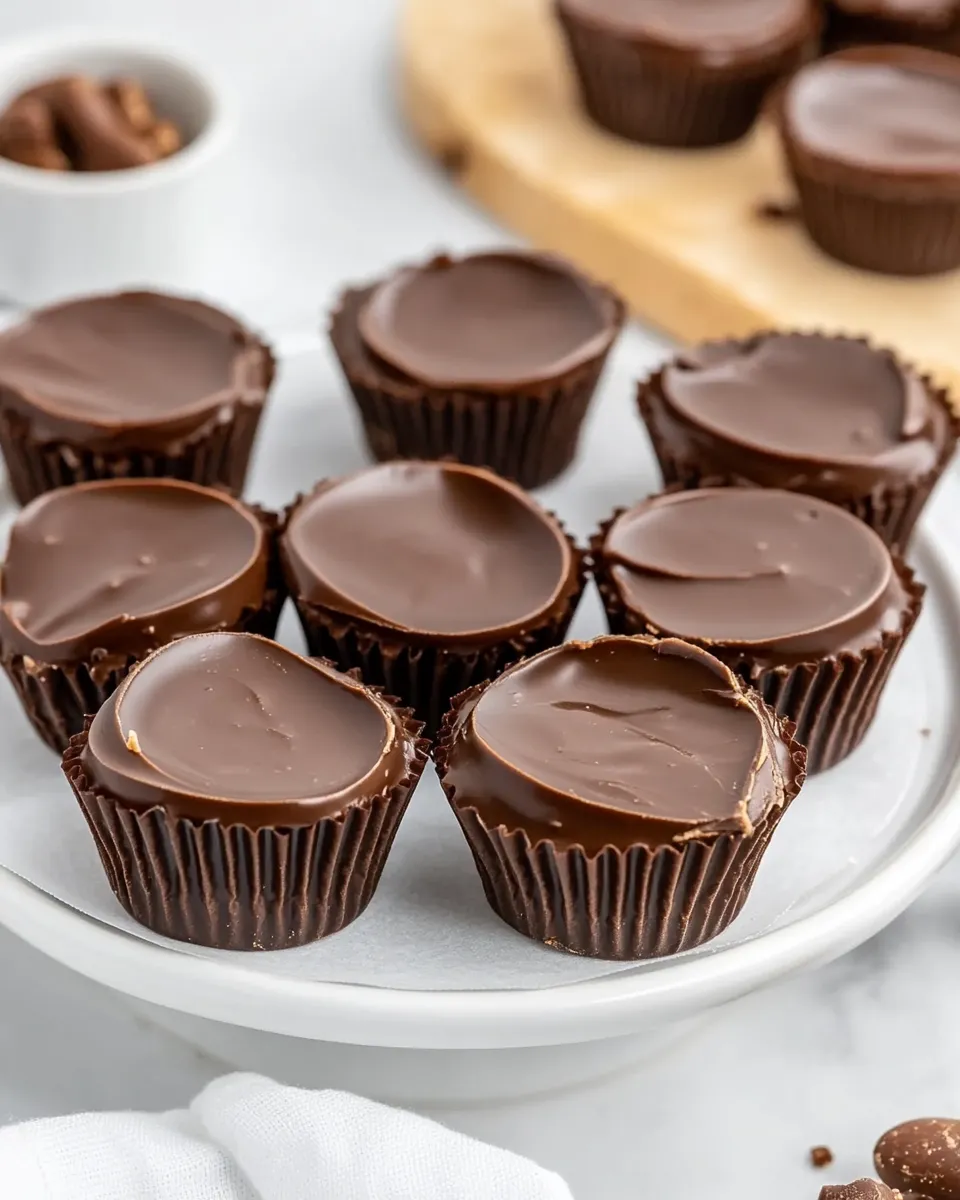
Place the muffin tin back in the fridge or freezer for at least 30 minutes, or until the chocolate is fully set and firm. Once ready, your homemade peanut butter cups are good to go!
Expert Tips
- Use room temperature peanut butter for easier mixing and smoother filling.
- Make sure the chocolate is not too hot when pouring over the peanut butter to prevent melting the filling.
- For a firmer filling, chill the peanut butter mixture before shaping it into discs.
- Use a silicone mold as an alternative to cupcake liners for perfectly uniform shapes.
- If you prefer a less sweet filling, reduce the powdered sugar and add a pinch more salt for balance.
- Experiment with different types of chocolate: dark, milk, or even white chocolate for unique flavors.
- Store the peanut butter cups in an airtight container to keep them fresh and prevent moisture from affecting the chocolate.
Variations and Customizations
- Crunchy Peanut Butter Cups: Use crunchy peanut butter instead of creamy for added texture.
- Nut-Free Version: Substitute sunflower seed butter or almond butter if peanut allergies are a concern.
- Flavor Boost: Add a splash of vanilla extract or a pinch of cinnamon to the peanut butter filling for extra warmth.
- Chocolate Swirl: Mix white chocolate with dark chocolate for a marbled effect on the surface.
- Sea Salt Topping: Sprinkle a tiny pinch of flaked sea salt on top of each peanut butter cup before chilling for a salty-sweet combo.
- Spicy Kick: Add a pinch of cayenne pepper or chili powder to the peanut butter filling for those who like a little heat.
- Vegan Version: Use dairy-free chocolate chips and a plant-based peanut butter to keep it completely plant-based.
How to Store Leftovers
Homemade peanut butter cups store beautifully in an airtight container. Keep them in the refrigerator for up to two weeks to maintain freshness and texture. If you want to keep them longer, you can freeze the cups for up to 3 months. Simply place parchment paper between layers to prevent sticking, and thaw them in the fridge before eating. Avoid storing peanut butter cups at room temperature in warm environments, as the chocolate may soften and melt.
FAQ
Can I use natural peanut butter for this recipe?
Yes, you can use natural peanut butter, but keep in mind that it tends to be thinner and oilier. You may need to adjust the amount of powdered sugar to achieve a firm filling. Chilling the mixture before shaping will also help it hold together better.
What type of chocolate works best for peanut butter cups?
Good quality semi-sweet or milk chocolate chips work wonderfully. Dark chocolate offers a richer, less sweet contrast to the peanut butter, while milk chocolate provides a classic, creamy sweetness. For a dairy-free option, choose vegan chocolate chips.
Can I make these peanut butter cups without coconut oil?
While coconut oil helps the chocolate set with a smooth, glossy finish, you can omit it if you prefer. Just be sure to melt the chocolate gently and stir frequently to avoid burning. The texture might be slightly different, but the end result will still be delicious.
How do I prevent the peanut butter filling from leaking out?
Make sure the peanut butter mixture is firm enough before shaping, and avoid overfilling the cups. When pouring the top chocolate layer, pour gently and make sure it completely covers the filling. Chilling each layer thoroughly before adding the next also helps keep everything in place.
Conclusion
Making your own peanut butter cups at home is not only rewarding but also allows you to enjoy a delicious treat made with quality ingredients and tailored to your taste preferences. These homemade peanut butter cups are creamy, rich, and perfectly balanced—a delightful combination of chocolate and peanut butter that’s hard to resist. Whether you keep them all to yourself or share them with friends and family, they’re sure to become a favorite go-to recipe. So grab your ingredients, follow these simple steps, and get ready to indulge in a homemade candy classic that’s better than anything you’ll find at the store!
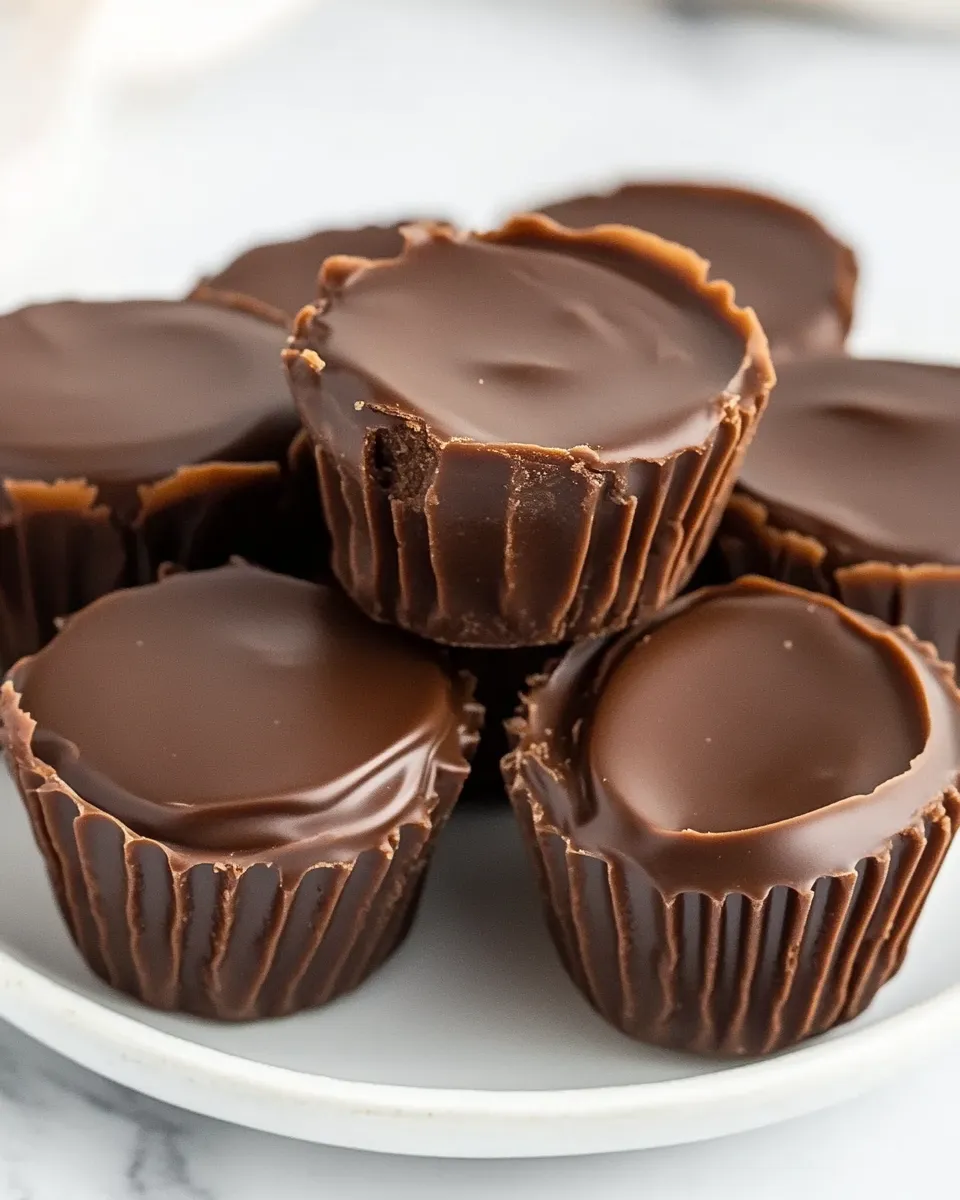
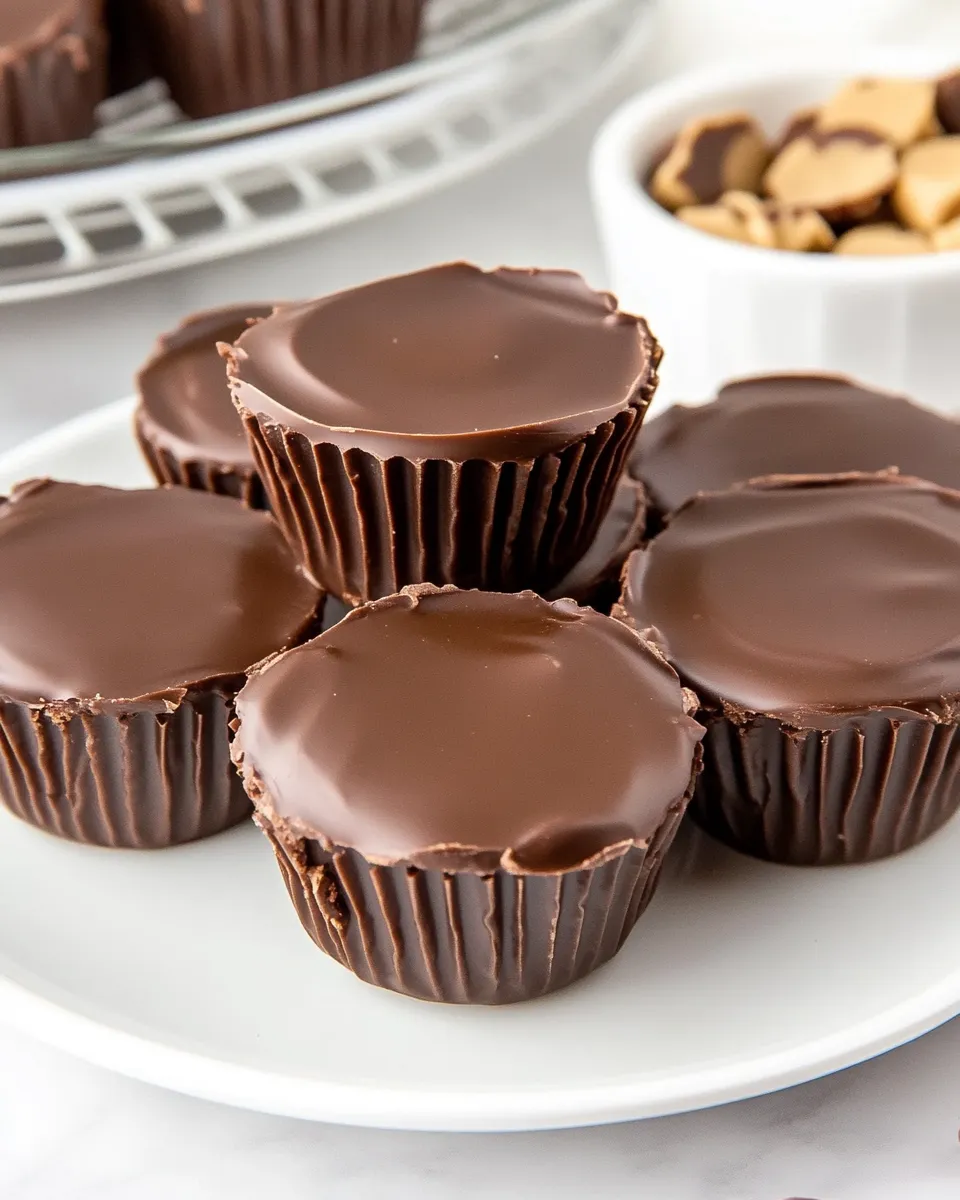
Homemade Peanut Butter Cups
Ingredients
- 1 cup creamy peanut butter smooth and unsweetened or lightly salted
- 1/4 cup powdered sugar adjust to taste
- 1/4 teaspoon fine sea salt optional, but enhances flavor
- 1 1/2 cups good quality dark or milk chocolate chips choose dairy-free if preferred
- 1 tablespoon coconut oil helps chocolate set with a smooth finish
- mini cupcake liners for shaping the cups
Instructions
- Line a standard muffin tin with mini cupcake liners. Set the tin aside on a baking sheet for easy transportation to the fridge or freezer.
- In a medium bowl, combine the creamy peanut butter, powdered sugar, and sea salt. Mix thoroughly until smooth and thick. Adjust powdered sugar if needed to create a firm filling.
- Melt the chocolate chips and coconut oil together using a double boiler or microwave in 30-second increments, stirring well each time.
- Spoon about 1 teaspoon of melted chocolate into the bottom of each cupcake liner and spread evenly. Chill in the fridge or freezer for about 10 minutes to harden.
- Scoop about 1 teaspoon of peanut butter filling, roll into a ball, and flatten into a disc. Place on top of the hardened chocolate base in each liner.
- Spoon more melted chocolate over the peanut butter discs to completely cover the filling. Tap the tin gently to smooth the chocolate and remove air bubbles.
- Chill the peanut butter cups in the fridge or freezer for at least 30 minutes until fully set and firm. Then enjoy your homemade treat!
Equipment
- Muffin Tin
- Mini Cupcake Liners
- Medium Bowl
- Double Boiler
- Microwave
- Spoon
- Baking Sheet