
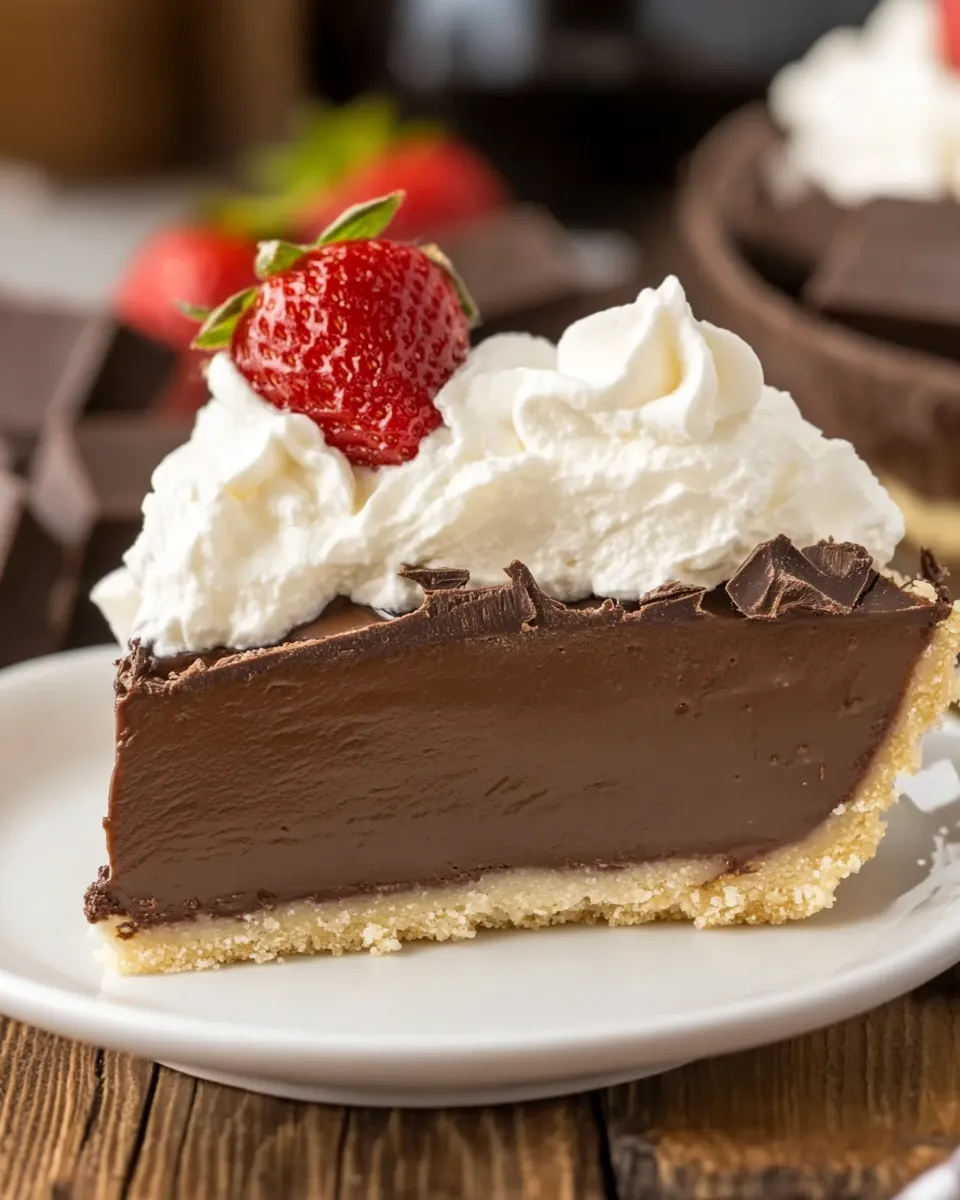
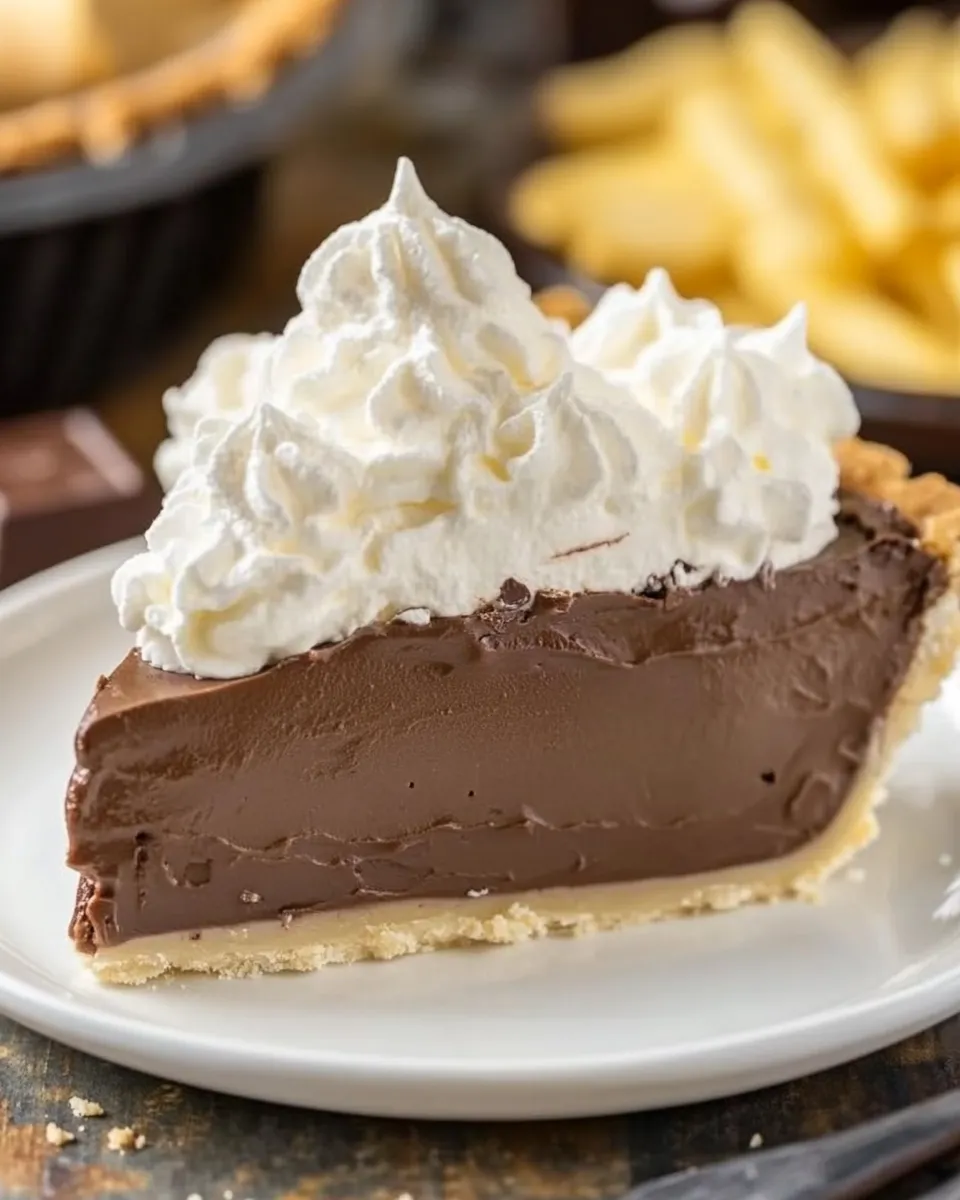
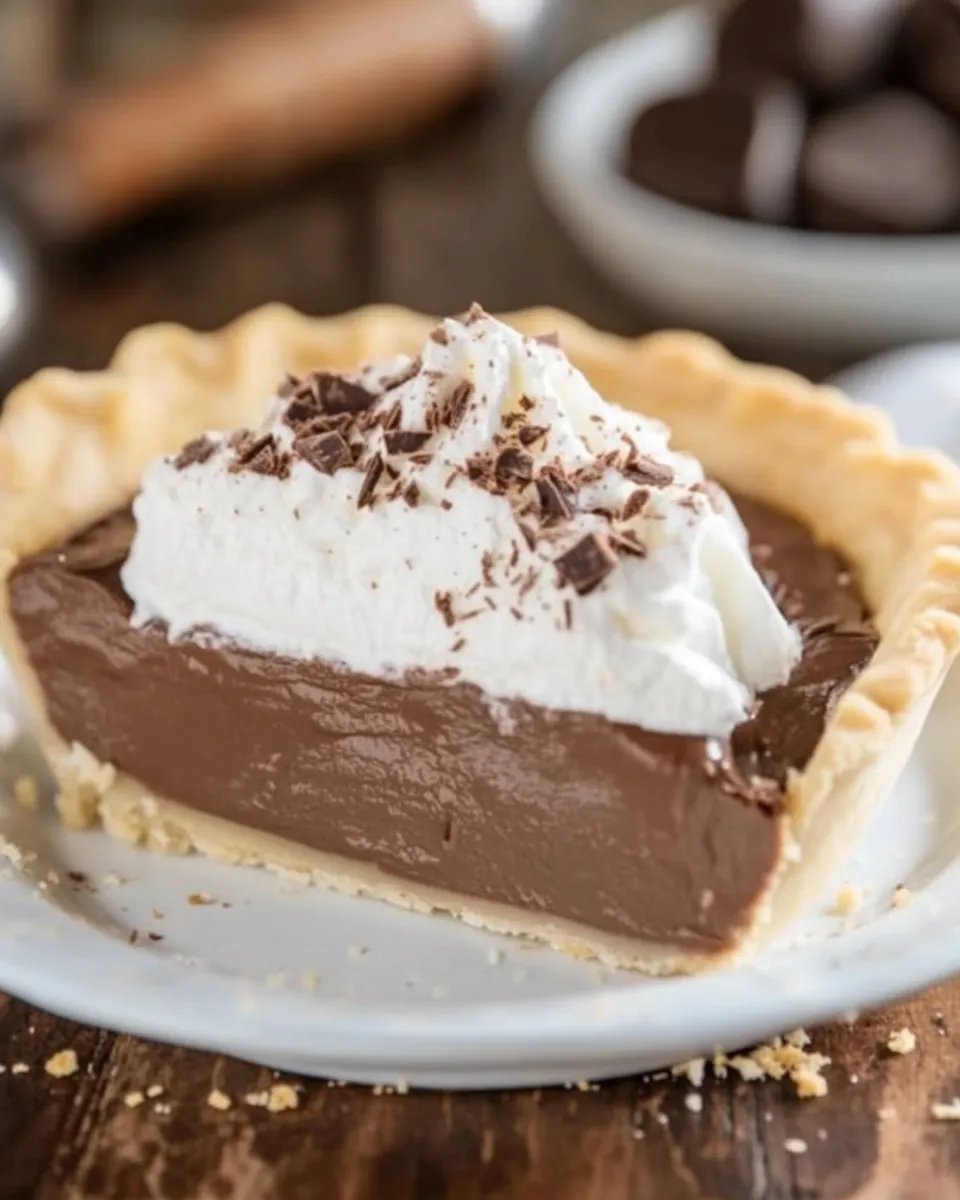
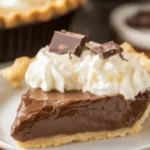
There’s something truly timeless about a classic chocolate cream pie. Rich, silky, and decadently smooth, this dessert has been a beloved favorite across generations. This Heirloom Chocolate Cream Pie recipe captures the essence of that nostalgia with a luscious chocolate filling nestled in a flaky, buttery crust, topped with a cloud of whipped cream. Whether you’re making it for a special occasion or simply craving a slice of comfort, this pie promises to deliver pure bliss in every bite. Let’s dive into why this recipe deserves a spot in your dessert repertoire!
Why This Recipe Is a Must-Try
This heirloom recipe stands apart because it’s crafted with simple, wholesome ingredients that come together to create an extraordinary dessert. The chocolate filling is luxuriously creamy, made with real cocoa and just the right amount of sweetness. It’s thick enough to slice perfectly but melts on your tongue with every forkful. The crust is crisp and buttery, providing an ideal contrast to the silky filling.
Moreover, this pie doesn’t rely on any complicated techniques or hard-to-find ingredients, making it accessible for bakers of all skill levels. It’s perfect for those who appreciate classic flavors with a homemade touch. Whether you’re serving this pie at a family gathering or enjoying a quiet night at home, it’s guaranteed to impress and satisfy chocolate lovers of all ages.
Ingredients
- For the Crust:
- 1 ¼ cups all-purpose flour
- ¼ cup granulated sugar
- ½ teaspoon salt
- ½ cup unsalted butter, cold and cut into cubes
- 3-4 tablespoons ice-cold water
- For the Chocolate Filling:
- 2 cups whole milk
- ½ cup heavy cream
- ¾ cup granulated sugar
- ⅓ cup unsweetened cocoa powder
- ¼ cup cornstarch
- 4 large egg yolks
- 2 tablespoons unsalted butter
- 1 teaspoon pure vanilla extract
- For the Whipped Cream Topping:
- 1 cup heavy whipping cream, chilled
- 2 tablespoons powdered sugar
- 1 teaspoon pure vanilla extract
How To Make Heirloom Chocolate Cream Pie Recipe
Step 1: Prepare the Pie Crust
Start by making the crust. In a large mixing bowl, whisk together the flour, sugar, and salt. Add the cold butter cubes, and using a pastry cutter or your fingertips, work the butter into the flour until the mixture resembles coarse crumbs with some pea-sized pieces. Gradually add the ice water, one tablespoon at a time, mixing until the dough just comes together. Avoid overworking the dough to keep it tender.
Turn the dough onto a lightly floured surface and press it into a disc. Wrap it in plastic wrap and refrigerate for at least 1 hour to chill.
Step 2: Blind Bake the Crust
Preheat your oven to 375°F (190°C). Roll out the chilled dough on a floured surface into a 12-inch circle. Gently transfer it to a 9-inch pie dish, pressing it into the edges. Trim any excess dough and crimp the edges if desired.
Line the crust with parchment paper or aluminum foil and fill it with pie weights or dried beans. Bake for 15 minutes, then remove the weights and parchment and bake for an additional 8-10 minutes until the crust is golden and fully cooked. Set aside to cool.
Step 3: Make the Chocolate Filling
In a medium saucepan, whisk together sugar, cocoa powder, and cornstarch until well combined. Slowly add the whole milk and heavy cream, whisking until smooth.
Place the saucepan over medium heat and cook, stirring constantly, until the mixture thickens and just starts to bubble.
In a separate bowl, lightly beat the egg yolks. Temper the yolks by gradually whisking in about ½ cup of the hot chocolate mixture. Then, pour the tempered yolks back into the saucepan, whisking constantly.
Cook for 2 more minutes, stirring continuously, until the custard is thick and smooth.
Remove from heat and stir in the butter and vanilla extract until fully incorporated.
Step 4: Assemble the Pie
Pour the warm chocolate filling into the cooled pie crust, smoothing the top with a spatula. Cover the pie with plastic wrap directly on the surface to prevent a skin from forming.
Refrigerate for at least 4 hours, or until fully set.
Step 5: Prepare the Whipped Cream Topping
Using a chilled bowl and beaters, whip the heavy cream with powdered sugar and vanilla extract until soft peaks form.
Spread the whipped cream evenly over the chilled chocolate filling or pipe it decoratively with a star tip.
Step 6: Serve and Enjoy
Slice the pie with a sharp knife, wiping the blade clean between cuts for perfect slices. Serve chilled and enjoy the rich, creamy, and utterly satisfying flavors of this heirloom chocolate cream pie.
Expert Tips
- Use high-quality cocoa powder for the best chocolate flavor.
- Be patient when thickening the custard; stirring constantly prevents lumps and scorching.
- Chill both the bowl and beaters before whipping cream to achieve maximum volume.
- For an extra flaky crust, ensure your butter and water are ice cold.
- If you want a firmer crust, brush it with a thin layer of melted chocolate before filling it.
- Allow the pie to chill overnight for the best texture and flavor development.
- Use a serrated knife to cut the pie for cleaner slices without disturbing the filling.
Variations and Customizations
- Peanut Butter Swirl: Swirl in some natural peanut butter into the chocolate filling before chilling for a nutty twist.
- Espresso Kick: Add 1 teaspoon of instant espresso powder to the cocoa mixture to enhance the chocolate depth.
- Chocolate Ganache Topping: Replace whipped cream with a rich chocolate ganache for an extra indulgent finish.
- Fruit Garnish: Top the pie with fresh raspberries or sliced strawberries for a pop of color and tartness.
- Nutty Crunch: Sprinkle toasted chopped hazelnuts or almonds on top of the whipped cream for added texture.
- Gluten-Free Option: Use a gluten-free flour blend to make the crust suitable for gluten-sensitive individuals.
How to Store Leftovers
Store any leftover pie in an airtight container or cover it tightly with plastic wrap and keep it refrigerated. The pie will stay fresh for up to 3 days. For the best texture, consume it within this timeframe. If you want to prepare in advance, you can make the crust and filling a day ahead and assemble just before serving. Avoid freezing the pie, as the whipped cream topping does not freeze well and the texture of the filling may change.
FAQ
Can I use a pre-made pie crust instead of making one from scratch?
Absolutely! A good-quality store-bought pie crust works well and can save you time. Just be sure to blind bake it before adding the filling to prevent sogginess.
Is it possible to make this pie dairy-free?
You can substitute the milk and cream with full-fat coconut milk or almond milk and use vegan butter alternatives. Keep in mind this will slightly alter the flavor and texture.
How do I prevent the chocolate filling from curdling when adding the egg yolks?
Temper the egg yolks by slowly whisking a small amount of the hot chocolate mixture into the yolks before adding them back to the saucepan. This gradual warming prevents curdling.
Can I make the pie ahead of time for a party?
Yes! This pie actually tastes better after chilling overnight as the flavors meld beautifully. Just add the whipped cream topping shortly before serving for the freshest look and taste.
Conclusion
This Heirloom Chocolate Cream Pie recipe is a timeless treasure that brings rich, creamy chocolate indulgence to your table with ease. Its perfect balance of a flaky crust, silky chocolate custard, and fluffy whipped cream topping makes it a show-stopper for any occasion. Whether you’re a seasoned baker or just starting out, this recipe is approachable and guaranteed to delight. Whip one up today and create your own family tradition centered around this classic treat!
Heirloom Chocolate Cream Pie Recipe
Ingredients
For the Crust:
- 1 1/4 cups all-purpose flour
- 1/4 cup granulated sugar
- 1/2 teaspoon salt
- 1/2 cup unsalted butter cold and cut into cubes
- 3-4 tablespoons ice-cold water
For the Chocolate Filling:
- 2 cups whole milk
- 1/2 cup heavy cream
- 3/4 cup granulated sugar
- 1/3 cup unsweetened cocoa powder
- 1/4 cup cornstarch
- 4 large egg yolks
- 2 tablespoons unsalted butter
- 1 teaspoon pure vanilla extract
For the Whipped Cream Topping:
- 1 cup heavy whipping cream chilled
- 2 tablespoons powdered sugar
- 1 teaspoon pure vanilla extract
Instructions
Step 1: Prepare the Pie Crust
- In a large mixing bowl, whisk together the flour, sugar, and salt. Add the cold butter cubes and work the butter into the flour until the mixture resembles coarse crumbs with some pea-sized pieces. Gradually add ice water, one tablespoon at a time, mixing until the dough just comes together. Avoid overworking the dough.
- Turn the dough onto a lightly floured surface and press it into a disc. Wrap in plastic wrap and refrigerate for at least 1 hour to chill.
Step 2: Blind Bake the Crust
- Preheat oven to 375°F (190°C). Roll out the chilled dough into a 12-inch circle. Transfer to a 9-inch pie dish, pressing into edges. Trim excess dough and crimp edges if desired.
- Line crust with parchment paper or foil and fill with pie weights or dried beans. Bake for 15 minutes, then remove weights and parchment and bake an additional 8-10 minutes until golden and cooked. Set aside to cool.
Step 3: Make the Chocolate Filling
- In a medium saucepan, whisk together sugar, cocoa powder, and cornstarch. Slowly add whole milk and heavy cream, whisking until smooth.
- Place saucepan over medium heat and cook, stirring constantly, until mixture thickens and starts to bubble.
- Lightly beat egg yolks in a separate bowl. Temper yolks by gradually whisking in about ½ cup of hot chocolate mixture. Pour tempered yolks back into saucepan, whisking constantly.
- Cook for 2 more minutes, stirring continuously, until custard is thick and smooth. Remove from heat and stir in butter and vanilla until incorporated.
Step 4: Assemble the Pie
- Pour warm chocolate filling into cooled pie crust, smoothing top with spatula. Cover pie with plastic wrap directly on surface to prevent skin from forming.
- Refrigerate for at least 4 hours, or until fully set.
Step 5: Prepare the Whipped Cream Topping
- Using a chilled bowl and beaters, whip heavy cream with powdered sugar and vanilla extract until soft peaks form.
- Spread whipped cream evenly over chilled chocolate filling or pipe decoratively with a star tip.
Step 6: Serve and Enjoy
- Slice pie with sharp knife, wiping blade clean between cuts for perfect slices. Serve chilled and enjoy.
Equipment
- Large Mixing Bowl
- Pastry cutter or fingertips
- Plastic Wrap
- Oven
- Rolling Pin
- 9-inch pie dish
- Parchment paper or aluminum foil
- Pie Weights or Dried Beans
- Medium Saucepan
- Whisk
- Mixing Bowl
- Beaters or electric mixer
- Spatula
- Sharp knife