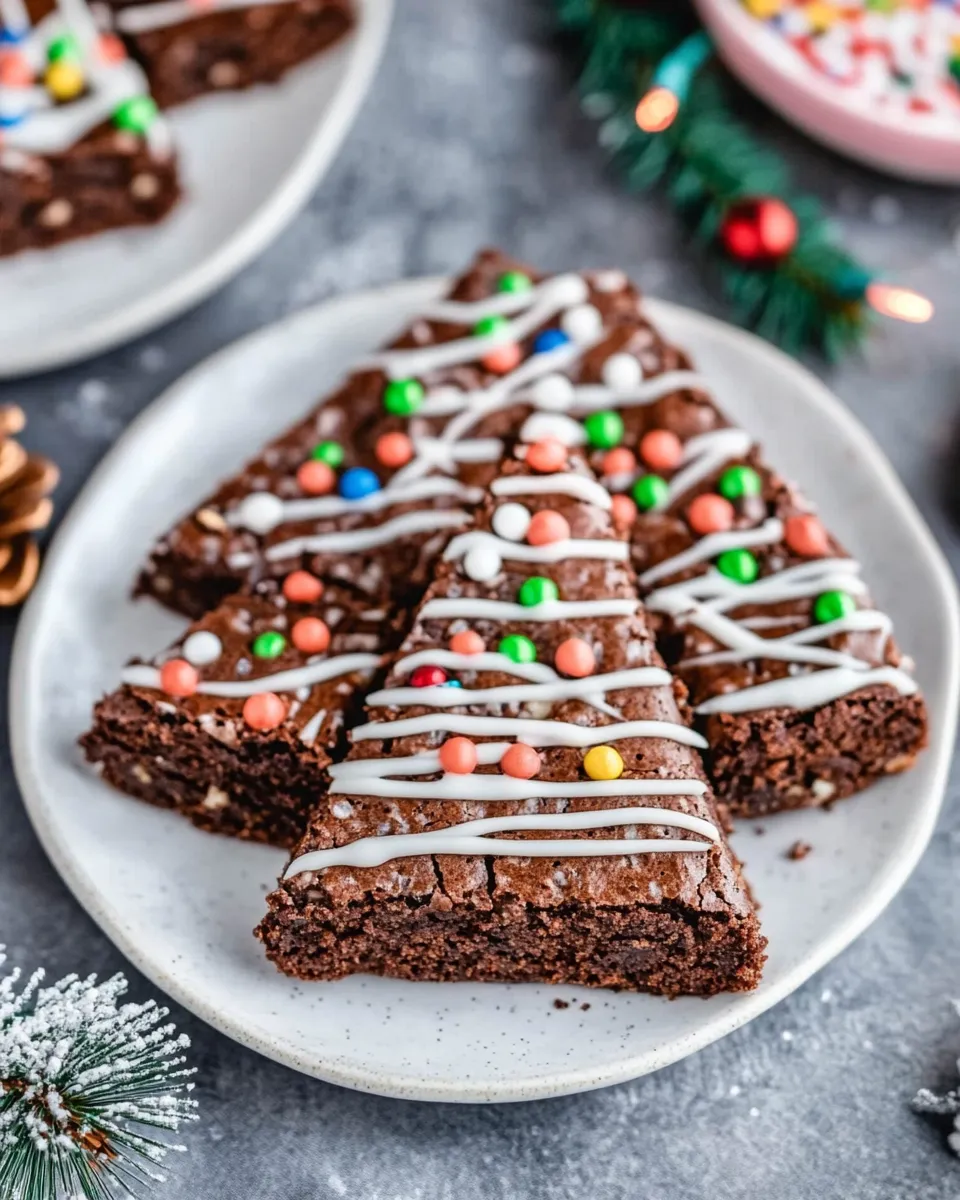
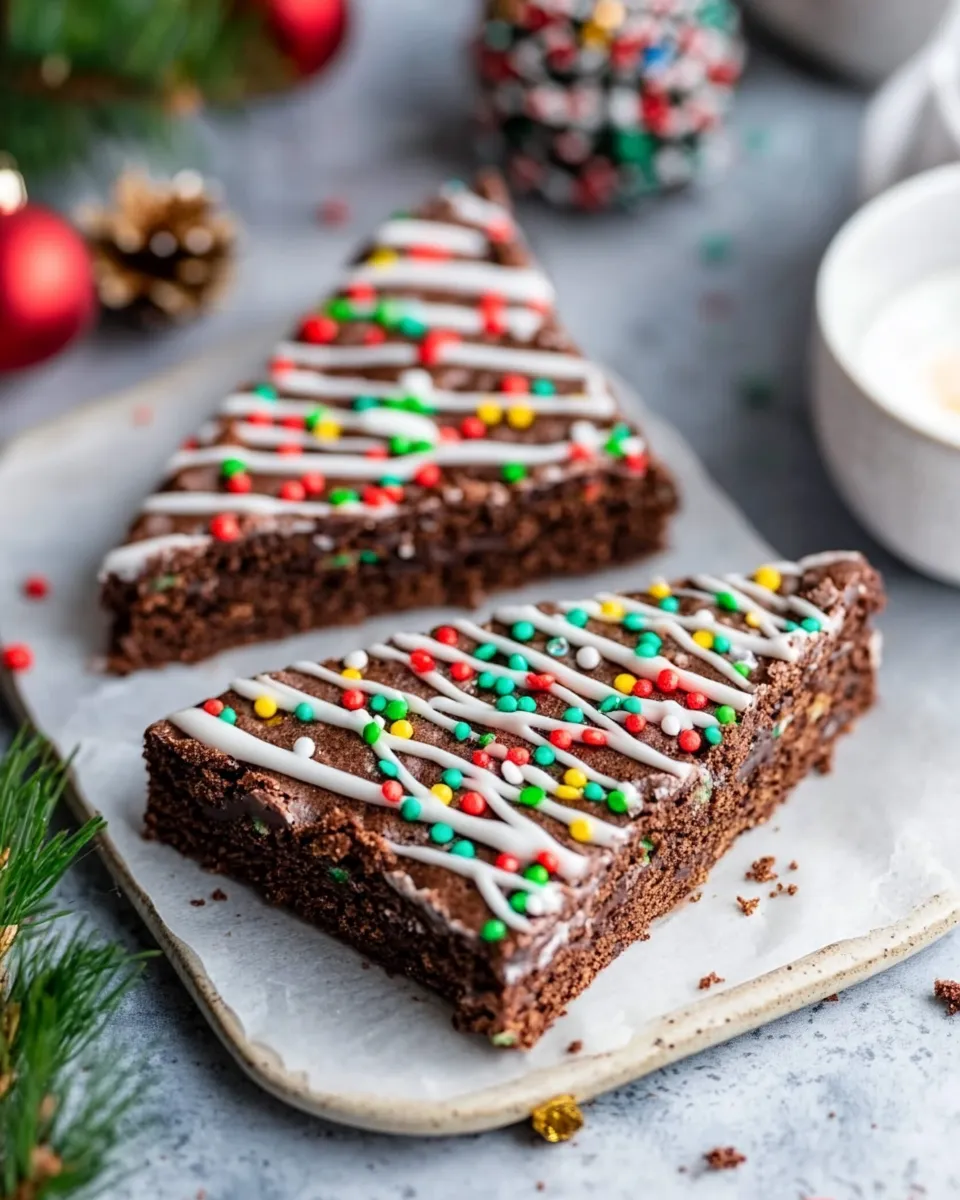
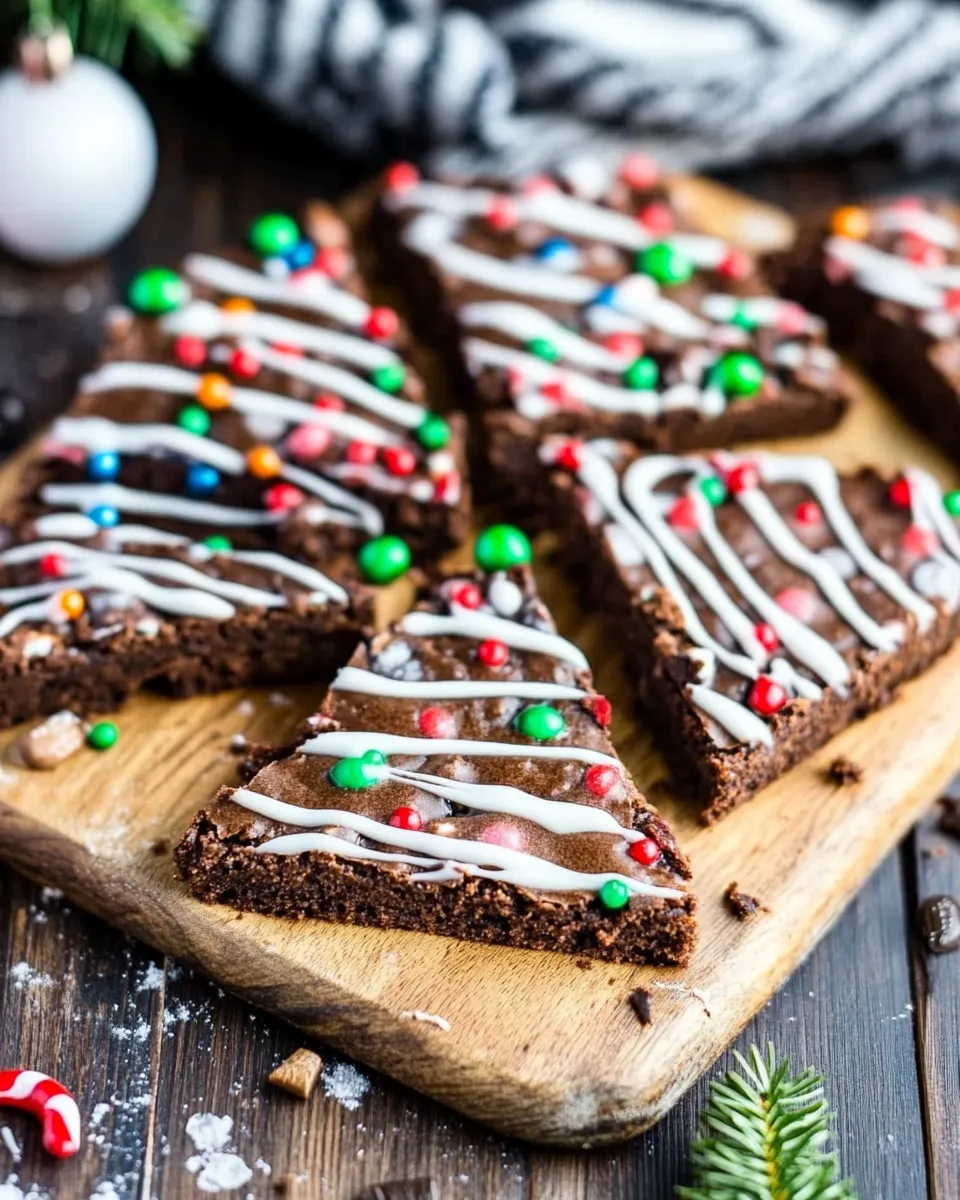
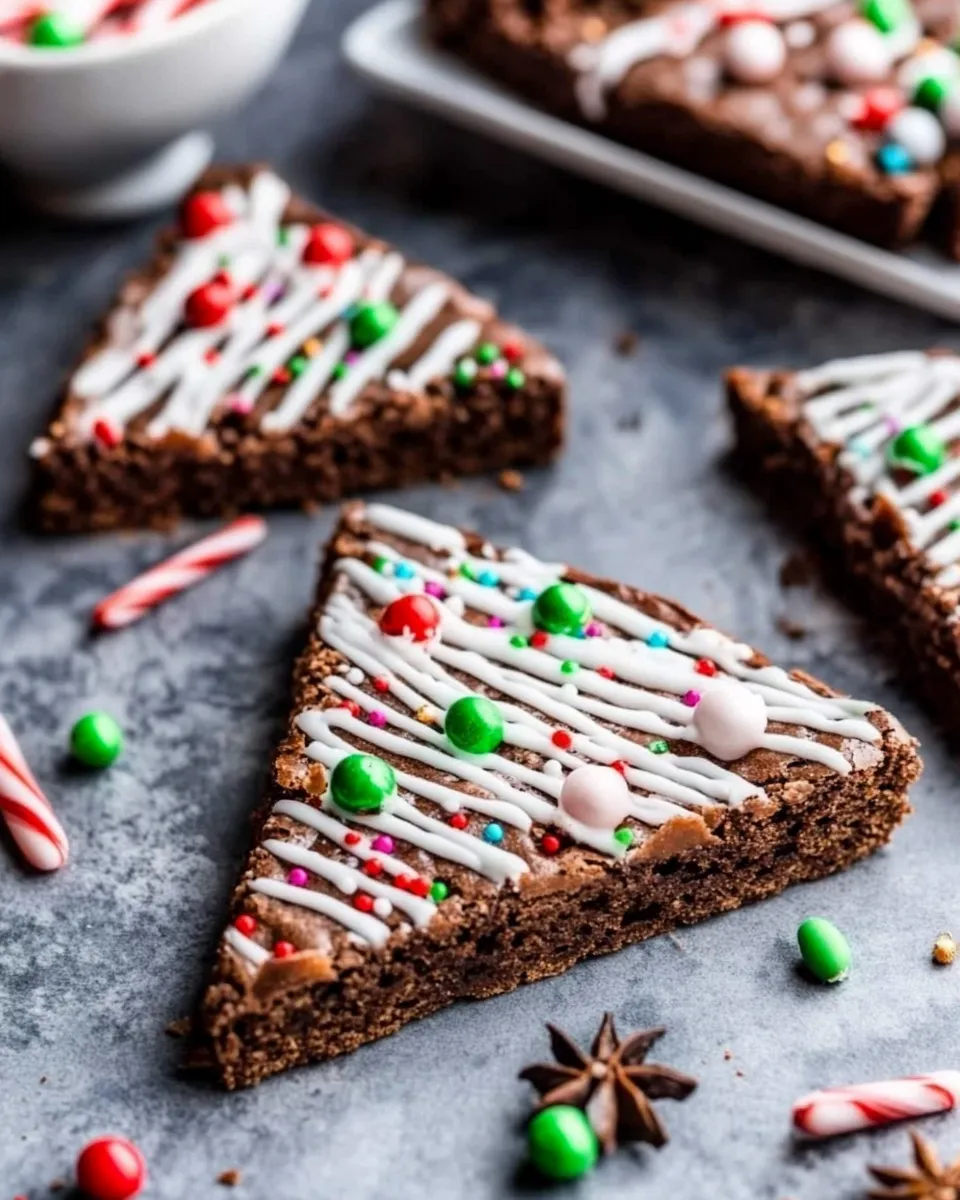
There’s something magical about the holiday season, and nothing brings that festive spirit into your kitchen quite like these Christmas Tree Brownies. Imagine rich, fudgy brownies cut into perfect tree shapes, decorated with colorful sprinkles and a dusting of powdered sugar that looks like freshly fallen snow. They’re not only delicious but also a fun and creative way to celebrate the season with family and friends. Whether you’re looking to impress at a holiday party or want to add a homemade touch to your dessert table, these Christmas Tree Brownies are sure to be a hit.
Why This Recipe Is a Must-Try
This recipe combines the classic crowd-pleaser—brownies—with festive, eye-catching presentation. The brownies are incredibly fudgy and chocolatey, with just the right balance of sweetness. They’re easy enough to make with kids or for a last-minute holiday treat. Plus, the decorating step is where you can really let your creativity shine. From colorful icing to edible glitter, these brownies bring joy both in taste and appearance.
These brownies use common, simple ingredients, and the recipe is designed to be accessible for bakers of any skill level. The best part? You don’t need any specialty baking pans—just a simple square or rectangular pan and a tree-shaped cookie cutter. It’s the perfect holiday project that looks impressive but is simple to pull off.
Ingredients
- 1 cup all-purpose flour
- 1 cup granulated sugar
- ½ cup unsweetened cocoa powder
- ½ teaspoon baking powder
- ¼ teaspoon salt
- ½ cup vegetable oil or melted coconut oil
- 2 large eggs
- 1 teaspoon pure vanilla extract
- ½ cup dairy-free margarine or vegetable-based shortening (for frosting)
- 2 cups powdered sugar (for frosting)
- 2 tablespoons cocoa powder (for frosting)
- 2–3 tablespoons water or plant-based milk (for frosting)
- Green food coloring (optional, for frosting)
- Assorted holiday sprinkles or edible decorations
- Powdered sugar (for dusting snow effect)
How To Make Christmas Tree Brownies
Step 1: Prepare Your Pan
Preheat your oven to 350°F (175°C). Line an 8×8-inch square baking pan with parchment paper, allowing some overhang for easy removal later. Lightly grease the parchment paper or pan to prevent sticking.
Step 2: Mix the Dry Ingredients
In a medium bowl, sift together the flour, cocoa powder, baking powder, and salt. Set aside.
Step 3: Combine the Wet Ingredients
In a large bowl, whisk together the sugar and oil until well combined. Add the eggs one at a time, mixing well after each addition. Stir in the vanilla extract.
Step 4: Create the Brownie Batter
Gradually add the dry ingredients to the wet ingredients, folding gently just until combined. Avoid overmixing to keep the brownies tender.
Step 5: Bake the Brownies
Pour the batter into the prepared pan and spread it evenly. Bake for 20 to 25 minutes, or until a toothpick inserted in the center comes out with a few moist crumbs. Allow the brownies to cool completely in the pan.
Step 6: Prepare the Frosting
In a medium bowl, beat the dairy-free margarine until creamy. Gradually add the powdered sugar and cocoa powder, mixing on low speed. Add water or plant-based milk tablespoon by tablespoon until you reach a spreadable consistency. Add green food coloring if desired and mix until the color is uniform.
Step 7: Cut Out the Christmas Tree Shapes
Once the brownies are completely cool, lift them out using the parchment paper. Use a Christmas tree-shaped cookie cutter to cut out as many trees as possible.
Step 8: Decorate the Trees
Spread a thin layer of the chocolate frosting over each brownie tree. Decorate with your favorite holiday sprinkles, edible pearls, or colored sugar. Dust lightly with powdered sugar to create a snowy effect.
Step 9: Serve and Enjoy
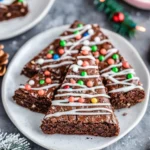
Arrange your Christmas Tree Brownies on a festive platter and watch them disappear quickly at your holiday gathering!
Expert Tips
- Make sure brownies are completely cool before cutting to avoid crumbling.
- If you don’t have a tree-shaped cutter, use a sharp knife to cut triangles and decorate them like trees.
- For extra fudginess, slightly underbake the brownies but ensure they are set.
- Use a piping bag for frosting to create detailed decorations like garlands or ornaments.
- To prevent the frosting from melting, store brownies at room temperature and add decorations just before serving.
- Line your baking pan with parchment paper, not foil, for easier removal and cleaner edges.
Variations and Customizations
- Nutty Delight: Add chopped walnuts or pecans to the brownie batter for a crunchy texture.
- Mint Chocolate: Add a teaspoon of peppermint extract to the frosting for a refreshing twist.
- White Chocolate Drizzle: Melt dairy-free white chocolate and drizzle over the decorated brownies.
- Gluten-Free: Substitute all-purpose flour with a gluten-free baking mix for a gluten-free version.
- Vegan Version: Replace eggs with flax eggs (1 tablespoon ground flaxseed + 3 tablespoons water for each egg) and use plant-based margarine.
- Colorful Trees: Use different food colorings in the frosting for multi-colored Christmas trees.
How to Store Leftovers
Store leftover Christmas Tree Brownies in an airtight container at room temperature for up to 3 days. To keep them fresh longer, refrigerate for up to a week. Before serving refrigerated brownies, allow them to come to room temperature for the best texture and flavor. These brownies can also be frozen for up to 3 months. Wrap them tightly in plastic wrap and place in a freezer-safe container. Thaw overnight in the refrigerator before decorating or serving.
FAQ
Can I use butter instead of vegetable oil in this recipe?
Yes, you can substitute vegetable oil with melted unsalted butter or a plant-based margarine alternative. This will give the brownies a richer flavor but may slightly change the texture.
How do I keep the brownies moist and fudgy?
To keep brownies moist, avoid overbaking them. Start checking for doneness a few minutes before the recommended baking time. The toothpick should come out with moist crumbs, not completely clean.
Can I make these brownies ahead of time?
Absolutely! You can bake the brownies a day or two in advance. Keep them wrapped tightly or stored in an airtight container. Decorate just before serving to keep the frosting and toppings fresh.
What if I don’t have a Christmas tree cookie cutter?
No worries! You can cut the brownies into triangles or rectangles and decorate them like trees using frosting and sprinkles. Alternatively, shape the brownies freehand with a knife for a rustic look.
Conclusion
Christmas Tree Brownies are the perfect festive treat to bring joy and chocolatey goodness to your holiday celebrations. With their fudgy texture, rich chocolate flavor, and charming holiday design, they’re sure to become a seasonal favorite. Plus, they’re simple enough to make with kids or to whip up when you need a quick but impressive dessert. Whether you stick with the classic version or explore some of the fun variations, these brownies will add a delightful sparkle to your Christmas festivities. Happy baking and happy holidays!
Christmas Tree Brownies
Ingredients
- 1 cup all-purpose flour
- 1 cup granulated sugar
- ½ cup unsweetened cocoa powder
- ½ teaspoon baking powder
- ¼ teaspoon salt
- ½ cup vegetable oil or melted coconut oil
- 2 large eggs
- 1 teaspoon pure vanilla extract
- ½ cup dairy-free margarine or vegetable-based shortening for frosting
- 2 cups powdered sugar for frosting
- 2 tablespoons cocoa powder for frosting
- 2–3 tablespoons water or plant-based milk for frosting
- Green food coloring optional, for frosting
- Assorted holiday sprinkles or edible decorations
- Powdered sugar for dusting snow effect
Instructions
- Preheat your oven to 350°F (175°C). Line an 8x8-inch square baking pan with parchment paper, allowing some overhang for easy removal later. Lightly grease the parchment paper or pan to prevent sticking.
- In a medium bowl, sift together the flour, cocoa powder, baking powder, and salt. Set aside.
- In a large bowl, whisk together the sugar and oil until well combined. Add the eggs one at a time, mixing well after each addition. Stir in the vanilla extract.
- Gradually add the dry ingredients to the wet ingredients, folding gently just until combined. Avoid overmixing to keep the brownies tender.
- Pour the batter into the prepared pan and spread it evenly. Bake for 20 to 25 minutes, or until a toothpick inserted in the center comes out with a few moist crumbs. Allow the brownies to cool completely in the pan.
- In a medium bowl, beat the dairy-free margarine until creamy. Gradually add the powdered sugar and cocoa powder, mixing on low speed. Add water or plant-based milk tablespoon by tablespoon until you reach a spreadable consistency. Add green food coloring if desired and mix until the color is uniform.
- Once the brownies are completely cool, lift them out using the parchment paper. Use a Christmas tree-shaped cookie cutter to cut out as many trees as possible.
- Spread a thin layer of the chocolate frosting over each brownie tree. Decorate with your favorite holiday sprinkles, edible pearls, or colored sugar. Dust lightly with powdered sugar to create a snowy effect.
- Arrange your Christmas Tree Brownies on a festive platter and watch them disappear quickly at your holiday gathering!
Equipment
- 8x8-inch square baking pan
- Parchment Paper
- Medium Bowl
- Large Bowl
- Whisk
- Christmas tree-shaped cookie cutter